

I had a SFD customer write to tell me how pleased she was with using the Sure-Fit Designs Children's Kit
She designed and made these great fitting shorts for her 9 year old daughter. She added this cute pocket detail that she copied from a pair of designer shorts from one of her daughter's friends. See her 'back side' highlighted by the white oval below.

Our SFD customer, Miranda (who prefers to remain anonymous), so kindly agreed to provide you a photo story of how to go about designing and sewing these pockets for your sewing projects. I thought you might like to see how this detail is accomplished.

The 'Bow' pieces consist of one rectangle 6" x 5" and one piece 3 1/2" x 2 1/2". The larger one being the 'bow' and the smaller one being the 'knot'.
The 'Pocket' pieces are two 5" squares that are cut on the bias.
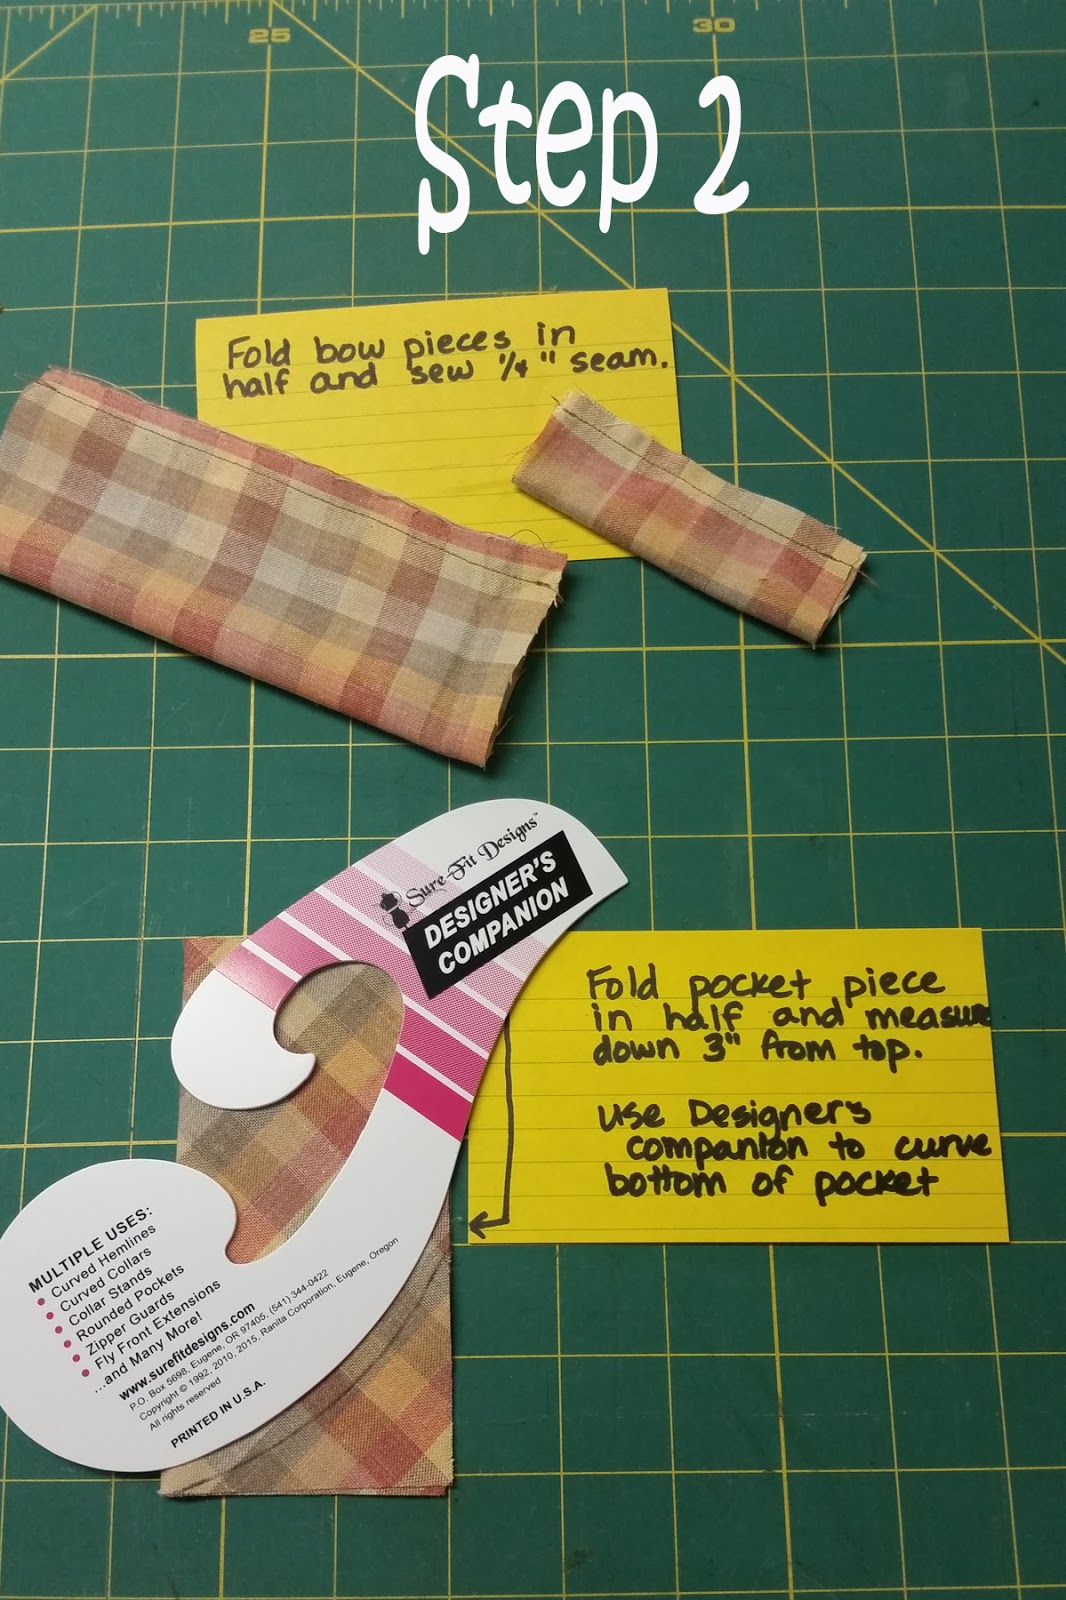
Fold the pocket pieces in half. Measure down 3" from the top. Use the SFD Designer's Companion to curve the bottom of the pocket.

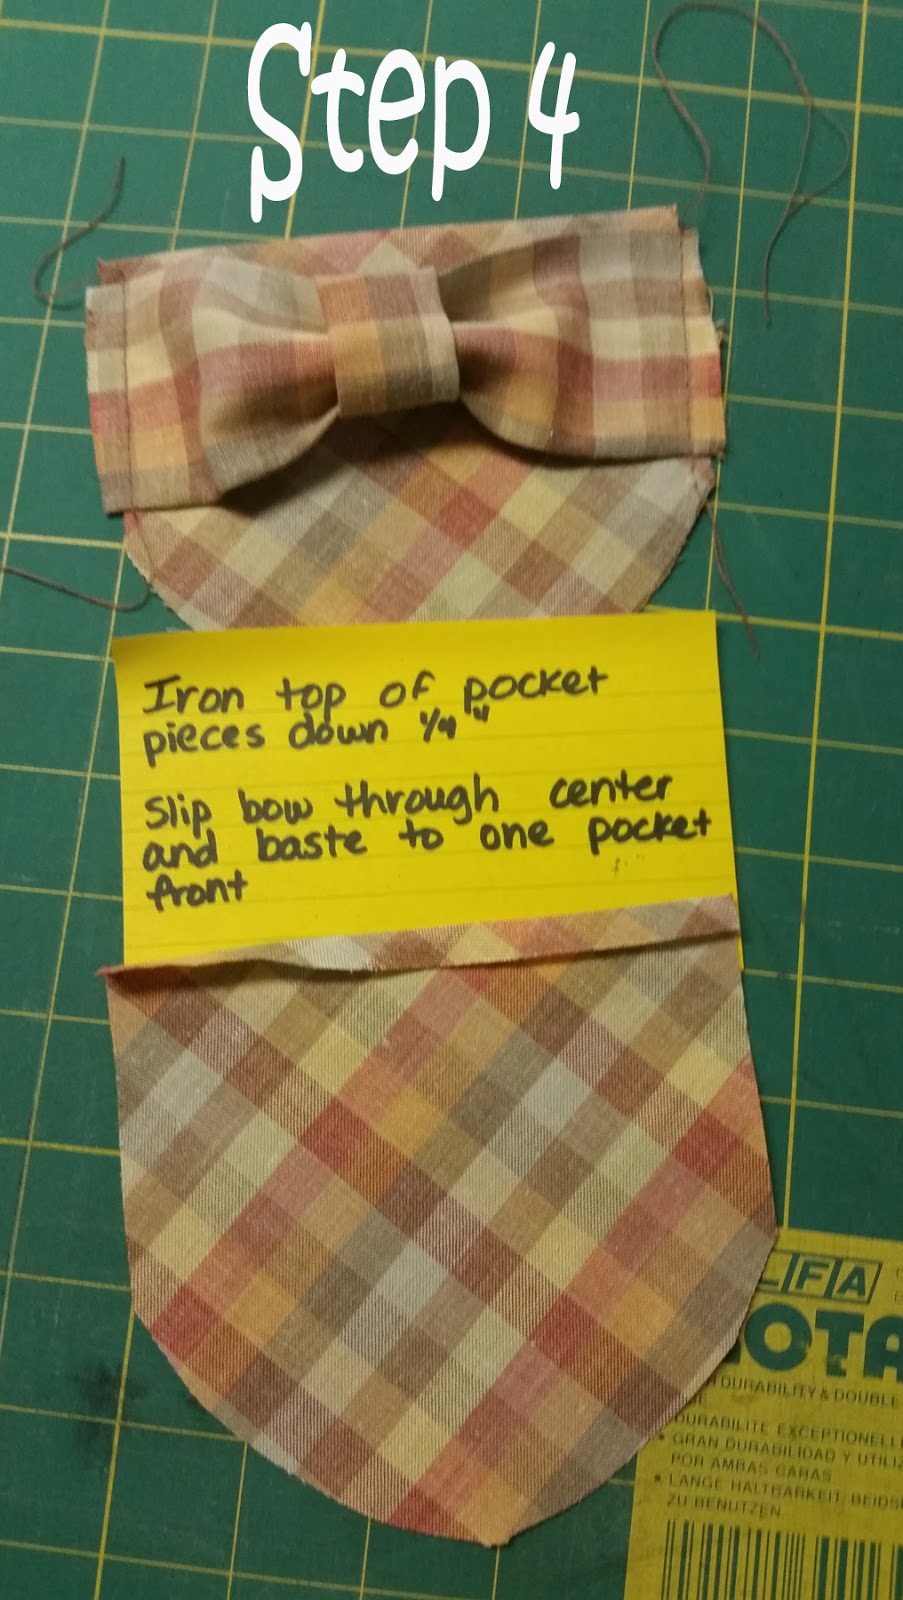
Turn the 'bow' and 'knot' pieces right side out and stitch ends of small piece.
Curve bottom of pocket and smooth out any ridges or bumps.

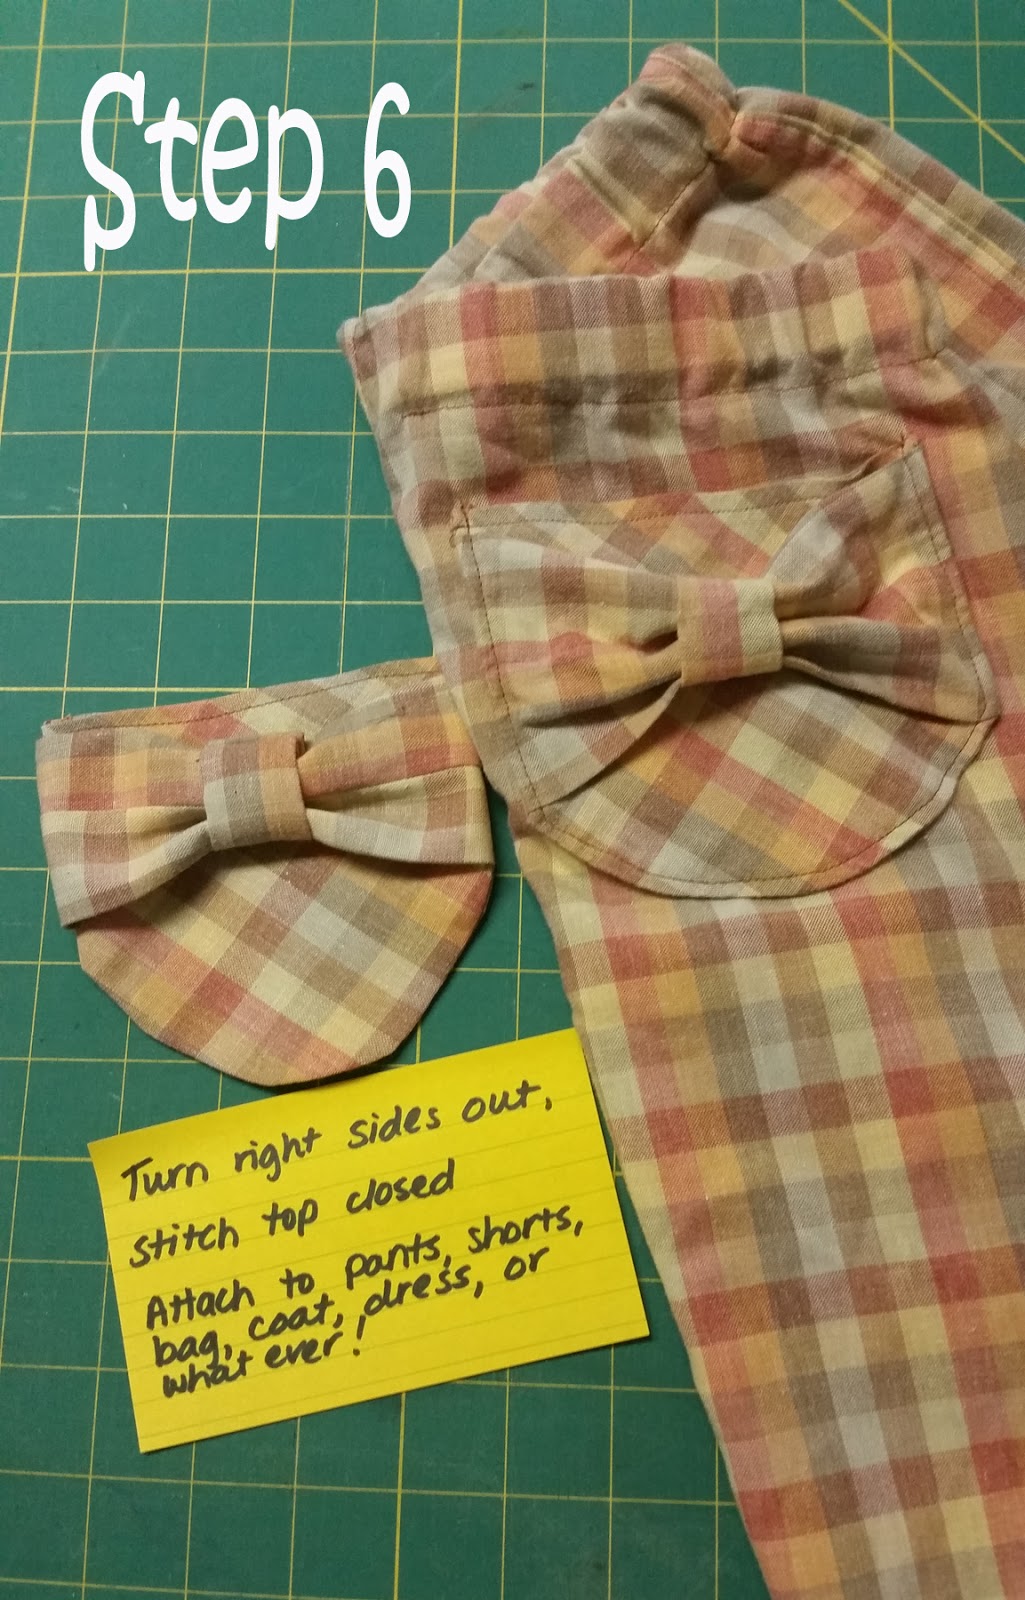
Turn right sides out. Top stitch the upper edge closed. Then simply attach to pants, shorts, shopping bag, coat, blouse or whatever project you think this pocket would look good on.
Have fun! If you choose to add this pocket detail to a garment that you've made using your Sure-Fit Designs Kits, please post a photo to our Facebook group page.
And thanks again to Miranda (from the Pacific NW of the USA) for sharing her success story with all of us and providing the pictorial tutorial.
#PocketDesign
#SureFitDesigns
#ChildrensKit
Happy Sewing,

Glenda the Good Stitch